
 |
| Happy Birthday to Rong (@nail_it_rong)! |
I am, and forever will be, indebted to the friends I've made through nail art. There is no doubt. In particular, this Birthday surprise gathering was an absolute blast. The ladies involved are super sweet, very fun and have brought little ole' fudddy-duddy me up to speed with a famous & delightful white cat.
Two other sweethearts joined us together in this little adventure - Doris (@dorisnailsdiary) and Angela (@glacewing). Check out the adorable collage that Angela put together full of the talent in the group:
The group's instructions were to create a design using the color blue and/or Hello Kitty. This adorable little character was brought to life when I was a kid - but somehow I missed the memo. I was a Garfield fan. Regardless, as an older gal, I can say that I had a lot of fun putting Hello Kitty decals on my nails. Here's some interesting HK facts straight from Wikepedia:
Hello Kitty is a fictional character produced by the Japanese company Sanrio, created by Yuko Shimizu and currently designed by Yuko Yamaguchi. She is depicted as an anthropomorphic white Japanese Bobtail cat with a red bow.
Shortly after her creation in 1974, Hello Kitty greeted the world with a "Hello!" on her first product. The Hello Kitty vinyl coin purse was introduced by Sanrio in March 1975. The character was then brought to the United States in 1976. The character is a staple of the kawaii segment of Japanese popular culture. By 2010, Sanrio had groomed Hello Kitty into a global marketing phenomenon worth $5 billion a year. By 2014, when Hello Kitty was 40 years old, she was worth about $7 billion a year, all without advertising except on Sanrio's, related show producers', and ticket sales' webpages and at show venues and nearby locations.
Originally aimed at pre-adolescent females, Hello Kitty's market has broadened to include adult consumers. She can be found on a variety of products ranging from school supplies to fashion accessories and high-end consumer products. Including various diamond necklaces. Several Hello Kitty TV series, targeted towards children, have been produced. Hello Kitty is also the main character at the two Japanese Sanrio theme parks, Harmonyland and the indoor Sanrio Puroland.
 |
| Cuteness indeed! |
Design Details
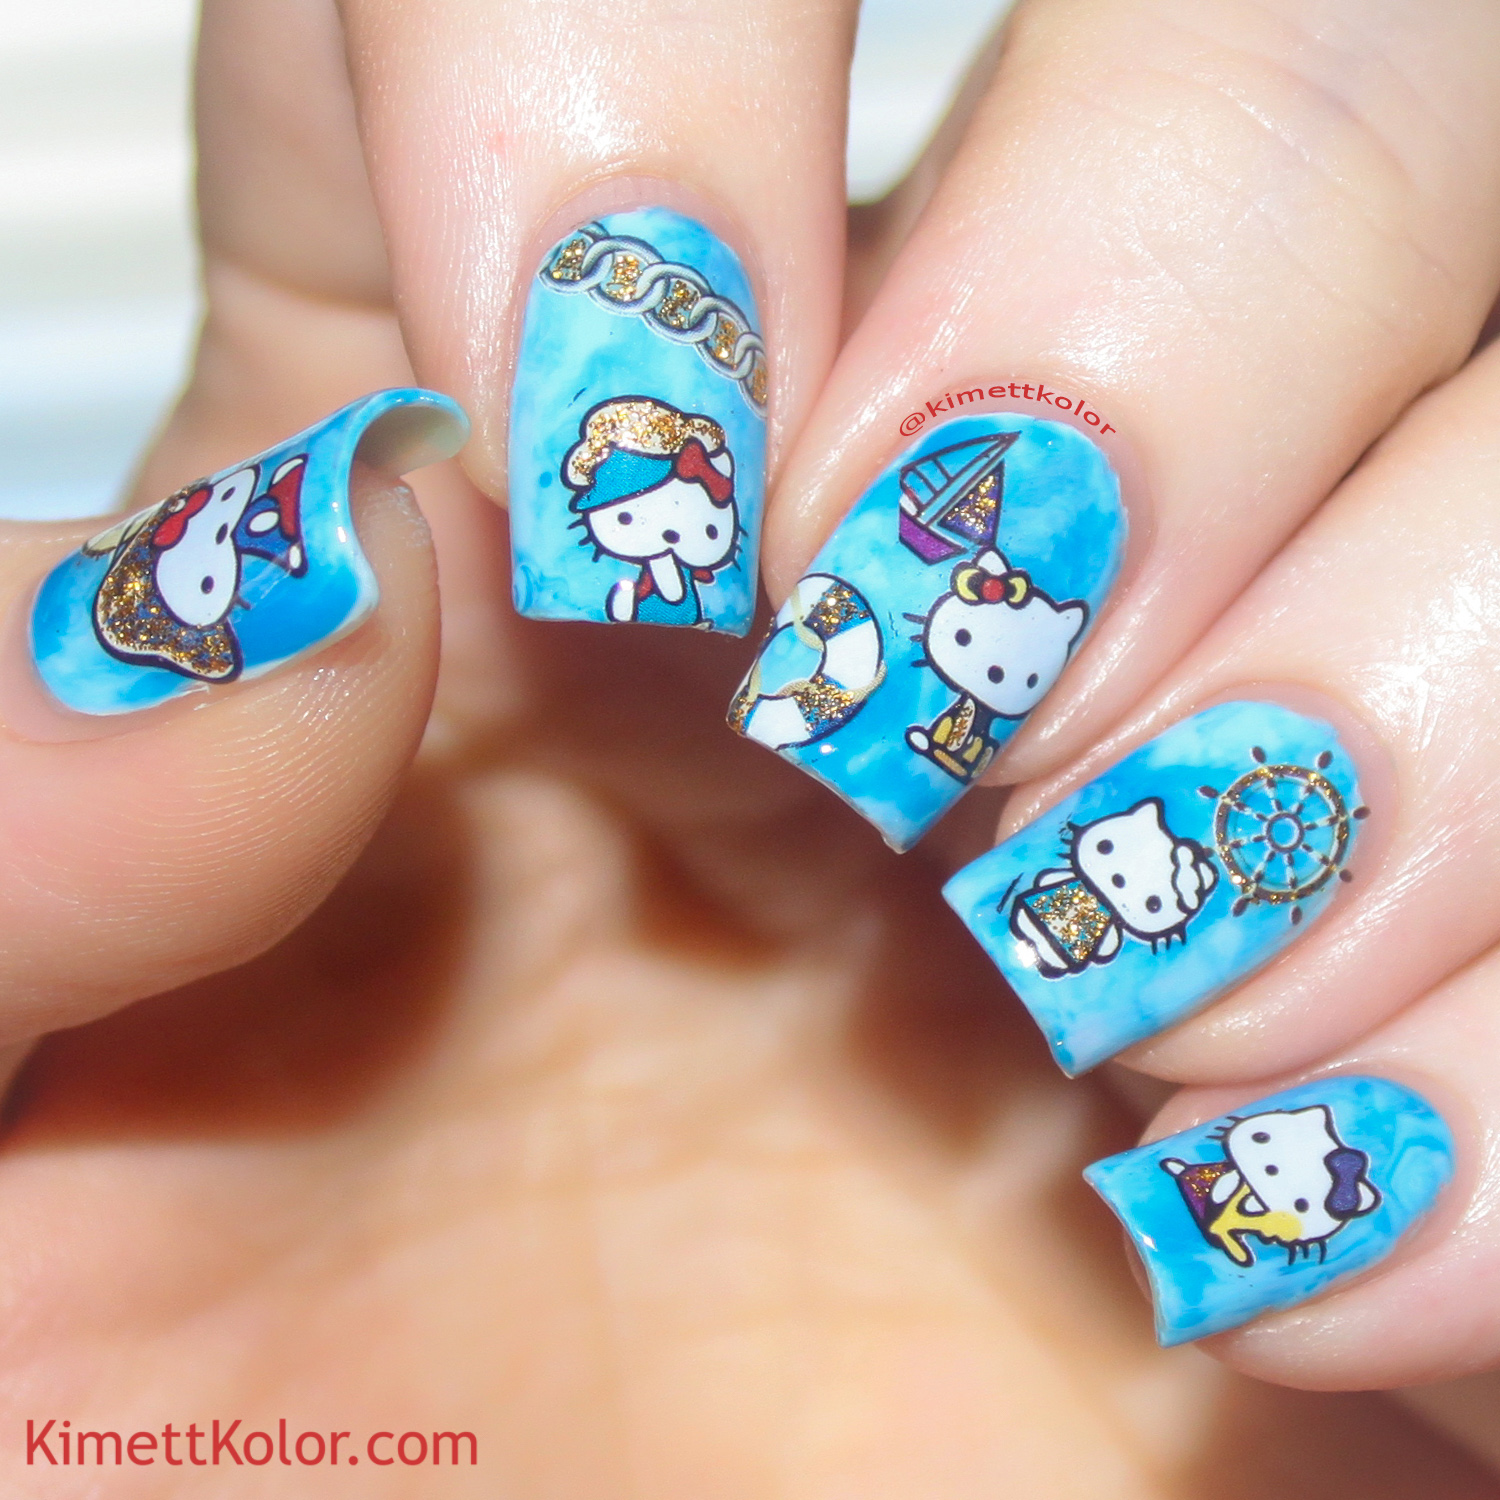
So...off I went on my crusade to plan a Hello Kitty design. I *was* going to hand-paint one...but Amazon had these adorable nautical HK water slide decals that added an even more fun element than I would have been able to pull off.
 |
| Out to sea! |
 |
| Anchor's away... |
Unlike the ratties in my the previous design, these water decals were a dream to apply. Yay!! The packaging doesn't have a brand name on it - but the item is W086, in case you wanted to get some.
For the base, I used the smoosh technique. You might remember seeing it in my yellow & grey design from earlier this year. However, having learned from the experience, I was much happier with the results this time. No need for glitter cover-up!
 |
| Watery smoosh |
Although you can't see it, I started with a base color using two coats of Zoya Blu and top-coat.
Then, to make my smoosh I applied random drops of polish directly onto the stamper head rather than a mat as I did before. I then applied the polish right onto to the nail. Because the polish is wet and thick - you get this wooshy mix of color as you gently slide and/or dab with the stamper. Such a fun technique!!
It just so happens that Rong and three other other ladies host a #SmooshyNailSunday event every week on Instagram. Sadly, I have yet to participate (not for lack of wanting to!). Hence, including this technique in Rong's design was spot-on (pun intended - LOL).The two polishes I used for my smoosh are from Loaded Lacquer. The light-blue crelly (bottle pictured above) is a Jelly Of The Month polish from January this year. The medium blue jelly (bottle pictured below) is called Island Punch.
 |
| Thought the name of this polish was fitting....sailing to Island Punch...LOL |
Polish Note: At the time of this post, it appears that this well-loved Indie brand is going to soon close up shop. Very sad. Heather had been making high-quality polishes for several years and I will cherish each one that I have. She and her polishes will be greatly missed by many.
Here's a look at my workstation with my design in progress - right after smooshing:
 |
| The smoosh technique is a bit messy - so I've applied the Simply Peel liquid latex barrier around each nail (it dries clear). As some of you who have used these products know - you can't let your fingers touch or the latex will stick them together - hence the more than usual awkward hand pose. |
I was hopeful that using these types of polishes (jelly/crelly) in my smoosh would help make the watery look I was going for. And, I believe I nailed it. Yay!
Most any kind of sheer polish would work for this effect, but the extra amount of clear suspension base in these makes a big difference. It gave a dimensional look to an otherwise flat design.
 |
| The glitter accents on these decals were just the right touch. |
Even though these were not my go-to style - I thoroughly enjoyed putting them together and wearing them. I'm loving all these challenges and collaborations because they are stretching my creativity.
Timing is everything. I had applied the base color one late afternoon last week. It was then during the following morning before sunrise (yup, you read that correctly) that I completed the smoosh and applied the decals.
So - my walk about in the yard was shortly after the sun was above the horizon. If you look close you'll see dew on some of the flowers (you should be able to click on the photo to enlarge it on your computer screen).
 |
| Enjoying the early morning sun rise taking kitty for a a walk around the yard... |
 |
| One more photo before we sail away... |
I had loads of fun with this post. I hope you enjoyed it!
Till Next Time,
Kimett